
Kubeflow
- By Kubeflow Charmers | bundle
- Cloud
| Channel | Revision | Published |
|---|---|---|
| latest/stable | 414 | 01 Dec 2023 |
| latest/candidate | 294 | 24 Jan 2022 |
| latest/beta | 430 | 30 Aug 2024 |
| latest/edge | 423 | 26 Jul 2024 |
| 1.9/stable | 426 | 31 Jul 2024 |
| 1.9/beta | 420 | 19 Jul 2024 |
| 1.9/edge | 425 | 31 Jul 2024 |
| 1.8/stable | 414 | 22 Nov 2023 |
| 1.8/beta | 411 | 22 Nov 2023 |
| 1.8/edge | 413 | 22 Nov 2023 |
| 1.7/stable | 409 | 27 Oct 2023 |
| 1.7/beta | 408 | 27 Oct 2023 |
| 1.7/edge | 407 | 27 Oct 2023 |
| 1.6/stable | 329 | 07 Sep 2022 |
| 1.6/beta | 326 | 23 Aug 2022 |
| 1.6/edge | 328 | 07 Sep 2022 |
| 1.4/stable | 321 | 30 Jun 2022 |
| 1.4/edge | 320 | 30 Jun 2022 |
juju deploy kubeflow --channel edge
Deploy Kubernetes operators easily with Juju, the Universal Operator Lifecycle Manager. Need a Kubernetes cluster? Install MicroK8s to create a full CNCF-certified Kubernetes system in under 60 seconds.
Platform:
This guide describes how you can get started with Charmed Kubeflow (CKF), from deploying to accessing it.
CKF provides a simple, out-of-the-box way to deploy Kubeflow with a single command. It sets default configurations, while still providing flexibility to configure it as you like.
This tutorial deploys the latest supported version of CKF. For using other versions, check Supported versions for compatibility with Kubernetes and Juju.
Requirements:
- Ubuntu 20.04 (Focal) or later.
- A host machine with at least a 4-core CPU processor, 32GB RAM and 50GB of disk space available.
Install and configure MicroK8s
Every Kubeflow instance needs a Kubernetes (K8s) cluster to run on. For this tutorial, you will be running a Kubeflow instance on MicroK8s, which provides a light way to spin up a K8s cluster.
MicroK8s is installed from a snap package with strict confinement. First, install MicroK8s as follows:
sudo snap install microk8s --channel=1.29-strict/stable
More info: Install MicroK8s
-
The published snap maintains different
channelsfor different releases of K8s. See Supported versions for compatibility between K8s and CKF. -
If you plan to use GPU with Charmed Kubeflow, then the Microk8s snap must be installed with classic confinement.
After MicroK8s is installed, it automatically starts running in the background. You need sufficient permissions to access MicroK8s. You can get those by running the following command:
sudo usermod -a -G snap_microk8s ubuntu
To refresh the newly granted permissions, restart your machine or run the following command:
newgrp snap_microk8s
MicroK8s is a light functional distribution of Kubernetes. For deploying CKF, additional Kubernetes features are needed, including a DNS service, storage, an ingress controller so that Kubeflow components can be accessed by the user and the MetalLB load balancer application.
These can be installed as MicroK8s add-ons. Run the following command to enable the required MicroK8s add-ons:
sudo microk8s enable dns hostpath-storage metallb:10.64.140.43-10.64.140.49 rbac
The configuration of the add-ons may take a few minutes to complete.
To confirm that all add-ons are available, run the following command:
microk8s status
Check that MicroK8s is running, and all addons are listed as enabled. If this is not the case, wait a few minutes and run the command again.
Install Juju
Juju is an Operation Lifecycle Manager (OLM) for bare metal, clouds or K8s. You will be using it to deploy and manage the components which make up Kubeflow.
To install Juju using snap, run this command:
sudo snap install juju --channel=3.4/stable
On some machines there might be a missing folder which is required for Juju to run correctly. To ensure that this folder exists, run:
mkdir -p ~/.local/share
As a next step, configure MicroK8s to work properly with Juju by running:
microk8s config | juju add-k8s my-k8s --client
The microk8s config command retrieves the client’s Kubernetes config which is then registered to Juju Kubernetes endpoints.
Next, run the following command to deploy a Juju controller to the Kubernetes that was set up with MicroK8s:
juju bootstrap my-k8s uk8sx
The controller may take a few minutes to deploy.
The controller is a Juju’s agent, running on Kubernetes, which can be used to deploy and control the Kubeflow components.
You now need to add a model for Kubeflow to the controller. The controller can work with different models, which map 1:1 to namespaces in K8s. In this case, the model name must be kubeflow. Run the following command to add the kubeflow model:
juju add-model kubeflow
Deploy CKF
MicroK8s uses inotify to interact with the file system. Kubeflow requires increasing the inotify limits. To do so, run the following commands:
sudo sysctl fs.inotify.max_user_instances=1280
sudo sysctl fs.inotify.max_user_watches=655360
If you want these commands to persist across machine restarts, add the following lines to /etc/sysctl.conf:
fs.inotify.max_user_instances=1280
fs.inotify.max_user_watches=655360
To deploy the CKF bundle with Juju, run the following command:
juju deploy kubeflow --trust --channel=1.9/stable
The deployment may take a few minutes to complete.
Once the deployment is completed, you get a message such as:
Deploy of bundle completed.
This means that all the bundle components have been kickstarted into action.
After the deployment, the bundle components need some time to initialise and establish communication with each other. This process may take up to 20 minutes.
You can use the following command to check the status of all the model components:
juju status
The deployment is ready when the statuses of all the applications and the units in the bundle have an active status. You can also use this option to continuously watch the status of the model:
juju status --watch 5s
During the deployment process, some of the components statuses may momentarily change to blocked or error state. This is an expected behaviour, and these statuses should resolve by themselves as the bundle configures. However, if any component remains stuck in the same error state, check Troubleshooting.
While you’re waiting for the Kubeflow bundle to prepare, you can move to the next section of this tutorial to perform some post-install configuration tasks.
Configure dashboard access
First, run this command to check the IP address of the Istio ingress gateway load balancer, which is the entry point for the entire bundle:
microk8s kubectl -n kubeflow get svc istio-ingressgateway-workload -o jsonpath='{.status.loadBalancer.ingress[0].ip}'
You should see this output like this: 10.64.140.43, which is the component’s IP address in the default MicroK8s configuration. If the output has a different IP, use that IP for the rest of this tutorial.
To enable authentication, run the following commands to set a username and a password for your Kubeflow deployment:
juju config dex-auth static-username=admin
juju config dex-auth static-password=admin
Verify deployment
To log in as a user, open a browser and visit the URL that was retrieved in the Configure dashboard access.
You should then see the Dex login screen. Enter the credentials you previously set up.
The first text field in the Dex login screen is called “Email Address”, but it is actually used for the static user’s username.
You should now see the Kubeflow “Welcome” page:

Click on the “Start Setup” button. On the next screen you will be asked to create a namespace. This is a way of keeping all the files and settings from one project in a single, easy-to-access place. Choose any name you like:

Once you click on the “Finish” button, the dashboard is displayed:
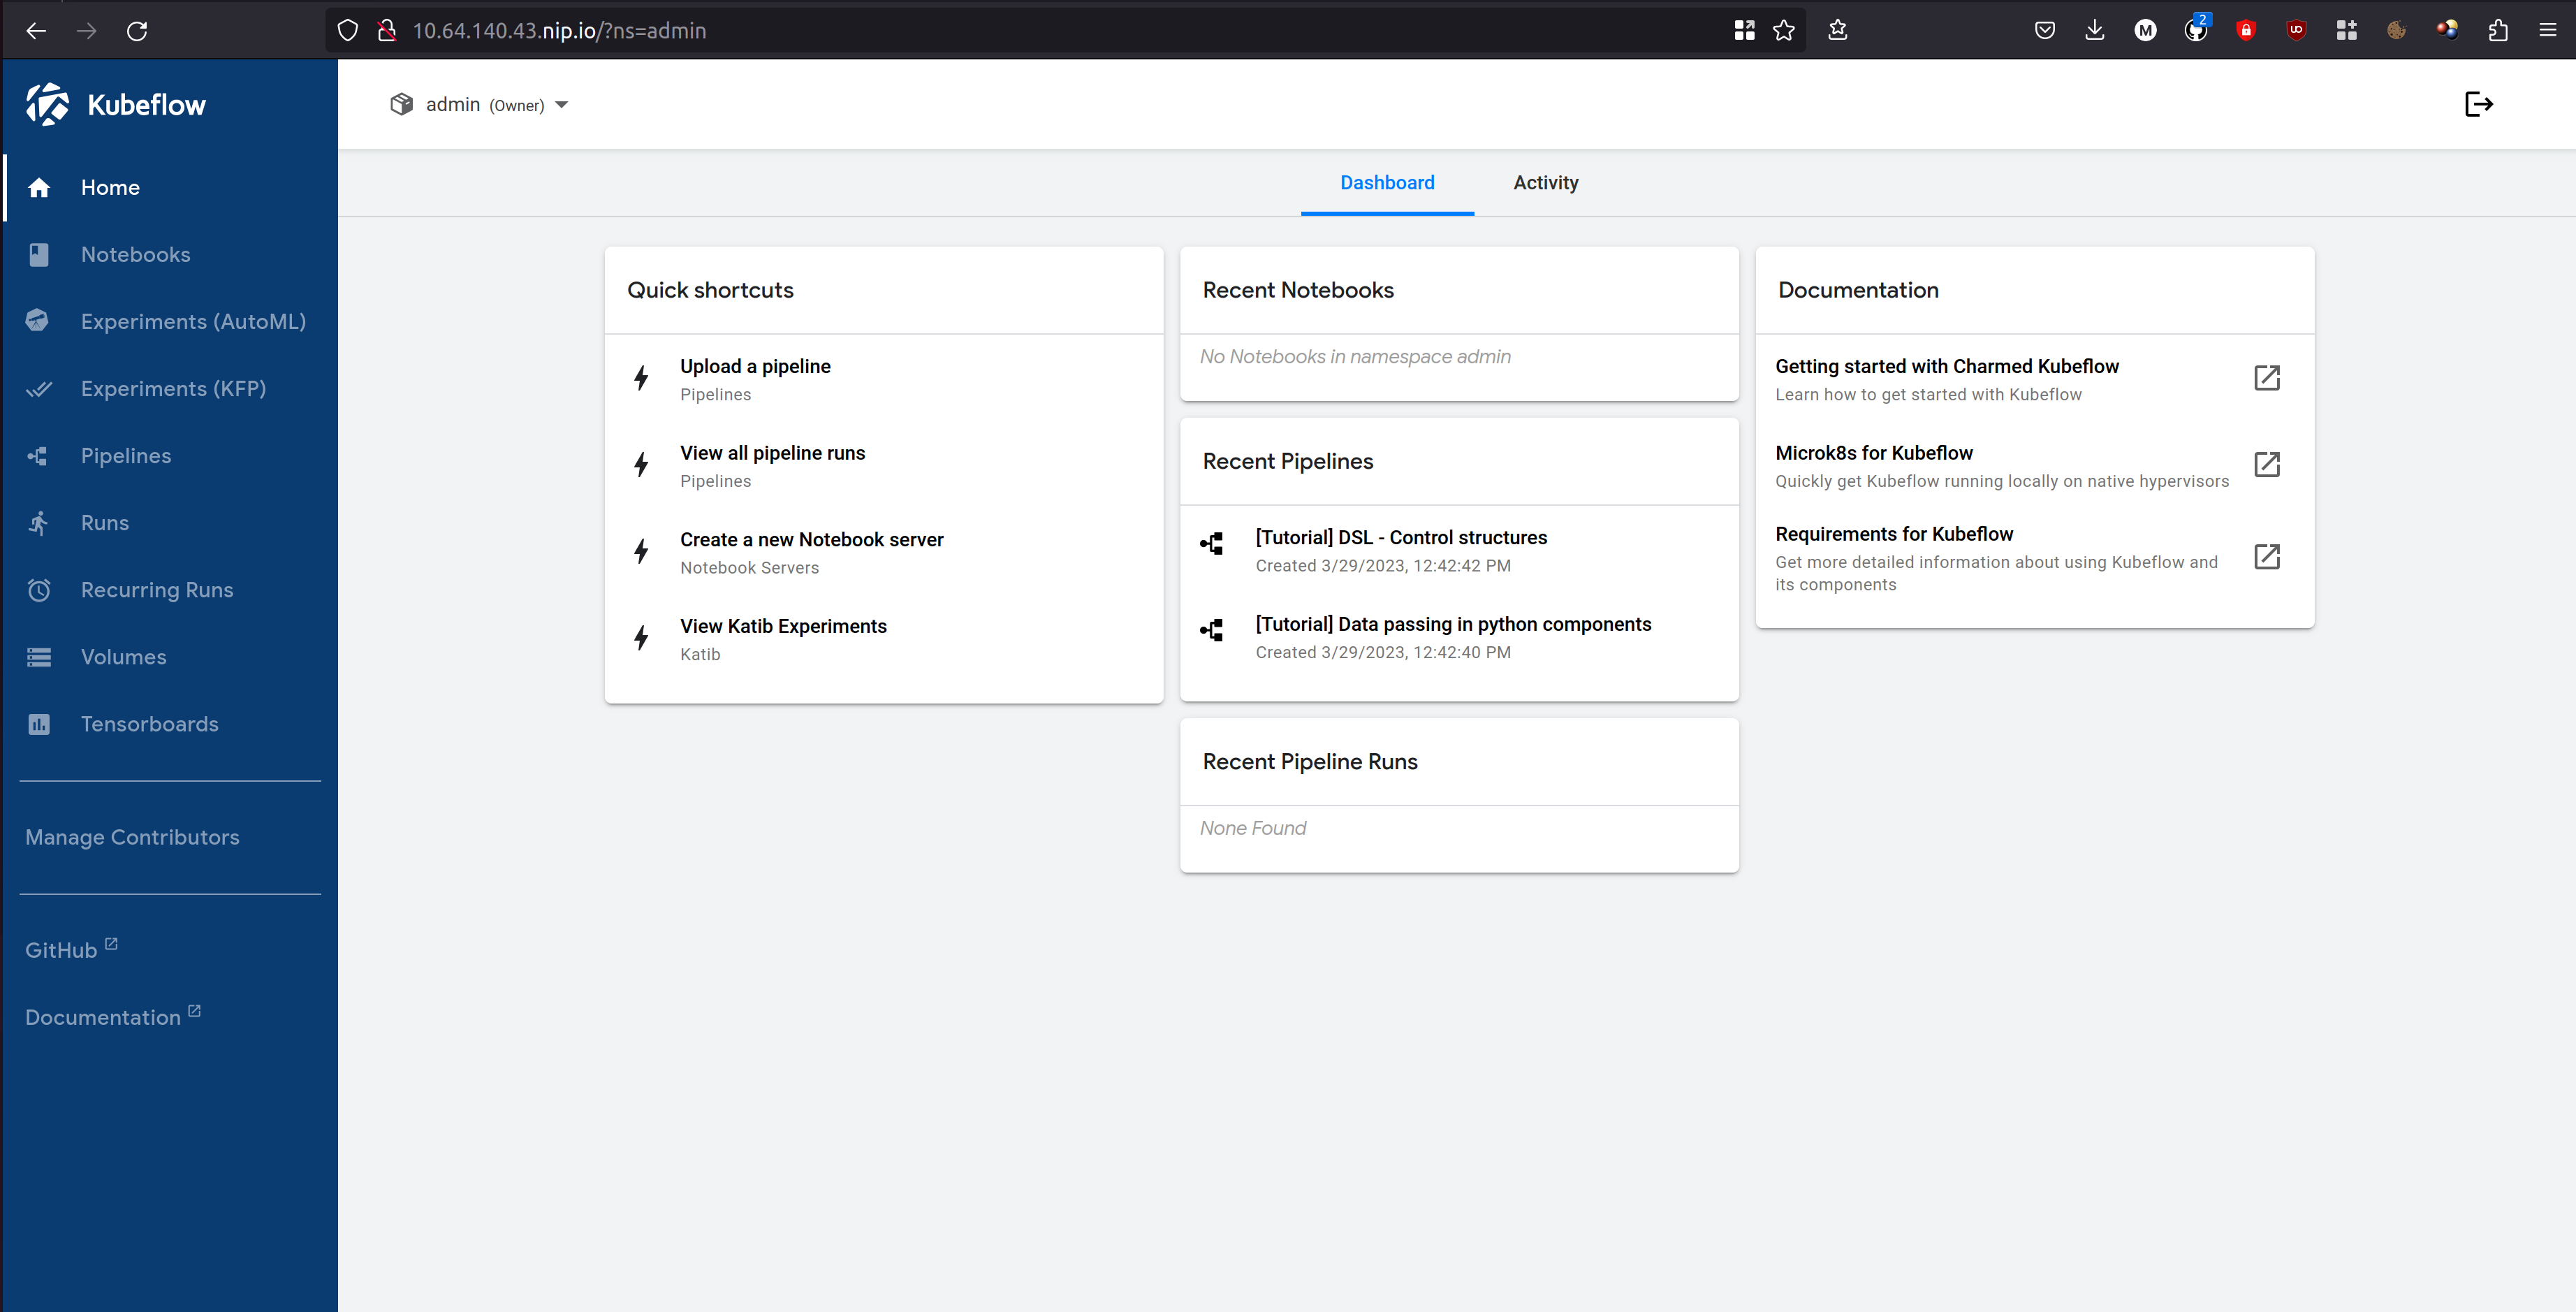
More information on accessing the dashboard can be found in this guide.
Troubleshooting
Crash Loop Backoff
If you see CrashLoopBackOff in the juju status output, it might mean that you forgot to update inotify as follows:
sudo sysctl fs.inotify.max_user_instances=1280
sudo sysctl fs.inotify.max_user_watches=655360
After doing that, the applications should slowly turn to active.
To confirm this is the issue, check the state of the pods in the cluster by running:
microk8s kubectl get pod -n kubeflow
Pods are expected to be in a Running state. If some pods are in CrashLoopBackOff state, you can further inspect the pod by checking the logs with:
microk8s kubectl logs -n kubeflow <name-of-the-pod>
If you see error messages like this one: “error”:“too many open files” then it’s likely inotify was the issue.
Next Steps
- To learn more about CKF components, see Explore components.
- To learn about differences between upstream Kubeflow and CKF, see Upstream vs Charmed Kubelow.